How to Sew a Simple Square Pincushion
Two fabric squares, one machine seam and a hand-sewn ladder stitch make a firm, useful pincushion. A good first project for learning to turn and close a gap.
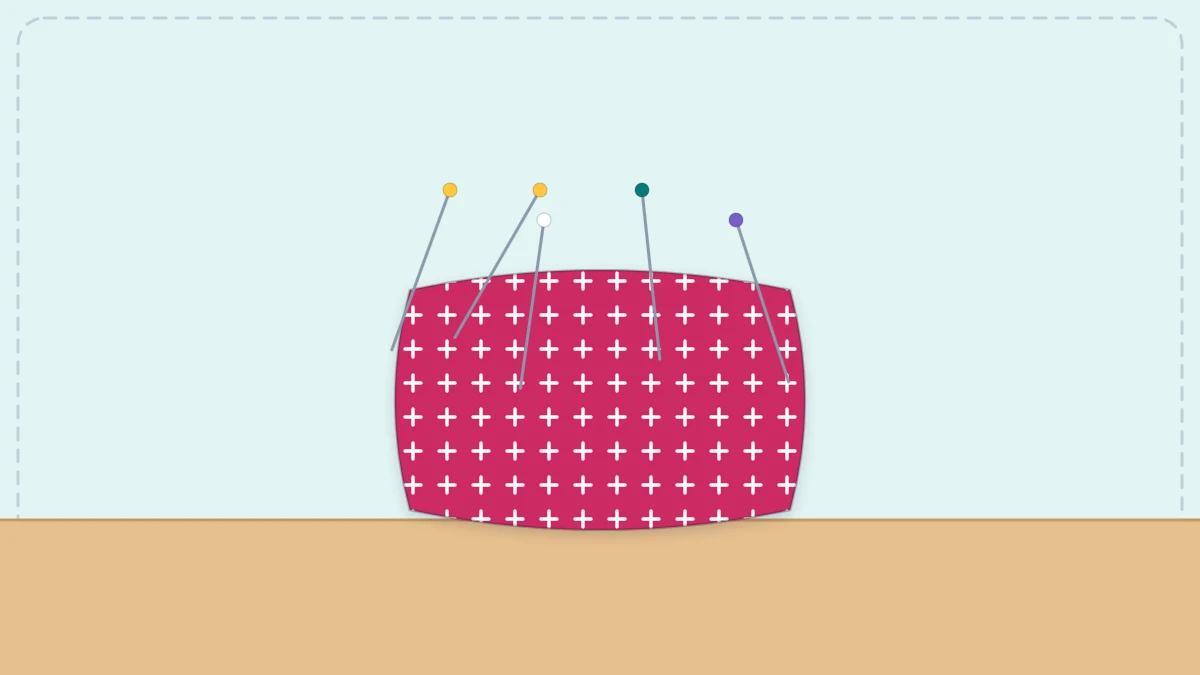
Tutorial at a glance
Materials
- Two 5 x 5 in (12.5 x 12.5 cm) squares of quilting cotton
- Polyester fiberfill stuffing
- All-purpose polyester thread
- Universal 80/12 machine needle
- Hand sewing needle
- Fabric scissors, ruler and chalk marker
- Pins or sewing clips
- Iron and a chopstick or blunt pencil
A simple pincushion is a classic first project for a good reason: it is two squares of fabric, one seam and a handful of stuffing, and you will use it every time you sew afterward. It also teaches two skills that come up constantly, leaving a gap for turning and closing that gap invisibly by hand.
What You Need
- Two scraps of quilting cotton, each at least 5 x 5 inches (12.5 x 12.5 cm)
- Polyester fiberfill stuffing, about two generous handfuls
- All-purpose polyester thread that matches the fabric
- A universal 80/12 machine needle
- A hand sewing needle
- Fabric scissors, a ruler and a chalk marker or pencil
- A few pins or sewing clips
- An iron, plus a chopstick or blunt pencil for corners and stuffing
Choose a tightly woven cotton so the stuffing does not work its way out and the pins slide in cleanly. The two squares can match or contrast. If your sewing kit is still coming together, the list of essential sewing tools for beginners covers the basics used here.
Cutting the Pieces
Press the scraps, then cut two identical squares.
| Piece | Cut | Size |
|---|---|---|
| Top square | 1 | 5 x 5 inches (12.5 x 12.5 cm) |
| Bottom square | 1 | 5 x 5 inches (12.5 x 12.5 cm) |
The seam allowance is 1/4 inch (0.6 cm) on all sides. That takes 1/2 inch in total from the width and the height, so the cushion measures 4 1/2 x 4 1/2 inches (11.5 x 11.5 cm) before stuffing. Once it is filled, it puffs up and measures a little less across, roughly 4 inches (10 cm).
Sewing the Pincushion Step by Step
- Stack the squares. Place the two squares right sides together, meaning the printed sides face each other. Line up all the edges and pin or clip them.
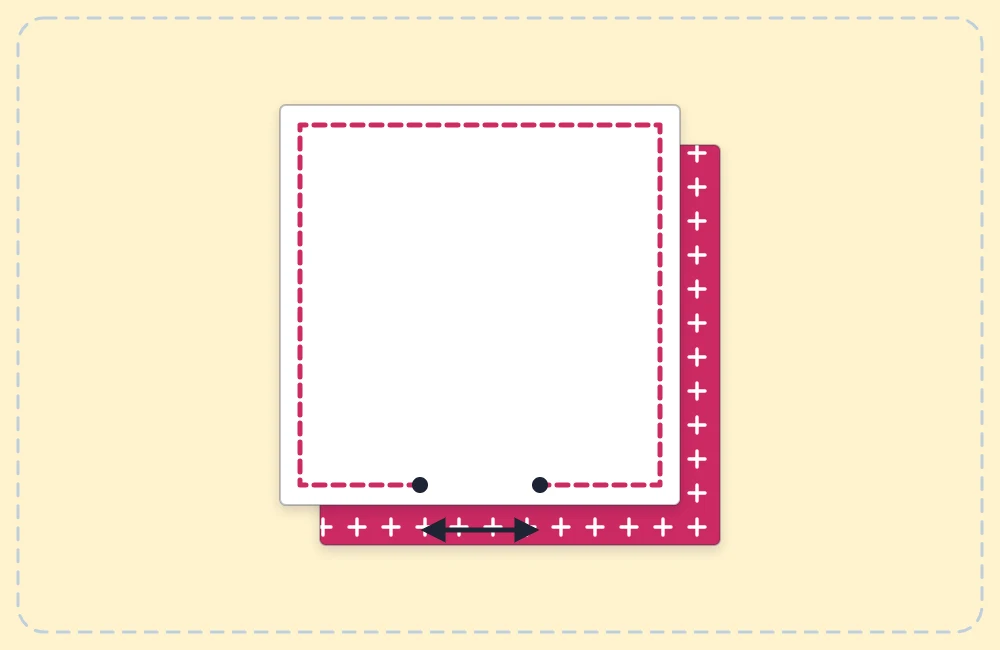
- Mark the gap. On one side, make two marks 2 inches (5 cm) apart, centered between the corners. Keeping the gap away from the corners makes it much easier to close neatly.
- Sew around the edge. Start at one mark and backstitch 3-4 stitches. Sew 1/4 inch (0.6 cm) from the edge. At each corner, stop with the needle down, lift the presser foot, turn the fabric a quarter turn, lower the foot and keep going. Stop at the second mark and backstitch again. Take out pins before they reach the needle.
- Clip the corners. Cut across each corner diagonally, leaving a few threads between the cut and the stitching. This removes bulk so the corners turn out square.
- Turn right side out. Pull the fabric through the gap. Push each corner out gently with the chopstick.
- Press. Fold the raw edges of the gap to the inside by 1/4 inch so they continue the line of the seam, then press the whole square flat. The pressed creases become your guide for hand sewing.
- Stuff the cushion. Push small tufts of fiberfill into the far corners first, then fill the middle. Use more than seems necessary. A pincushion should feel firm, almost like a tennis ball, so pins stand upright.
Tip
The backstitches on either side of the gap matter more than usual. Turning and stuffing pull hard on those two points, and without backstitching the seam starts to open.
If your stitching line wobbled, the cushion will still work. For the next one, how to sew a straight seam explains how to guide the fabric edge along the needle plate markings.
Closing the Gap With a Ladder Stitch
A ladder stitch is a hand stitch that joins two folded edges from the outside. The thread crosses back and forth between the folds like the rungs of a ladder, and when you pull it snug the rungs disappear into the seam. It is also called a slip stitch or invisible stitch.
- Thread and knot the needle. Cut about 18 inches (46 cm) of thread, thread the hand needle and knot one end. A single strand is enough.
- Hide the knot. Bring the needle up from inside the cushion through the crease of one folded edge, right where the machine stitching ends. The knot stays inside.
- Take the first stitch. Directly across from where the thread comes out, slide the needle into the crease of the opposite edge. Run it along inside the fold for about 1/8 inch (0.3 cm) and bring it out.
- Cross back. Go straight across to the first edge and take another 1/8 inch stitch inside that fold. Keep alternating sides, with each stitch starting directly opposite the place the thread last came out.
- Pull the thread snug. Every three or four stitches, pull gently. The two folds draw together and the stitches sink out of sight. Add a last tuft of stuffing before the gap gets too small.
- Knot and bury the tail. At the end of the gap, take a tiny stitch, pass the needle through the loop to form a knot, and repeat once. Push the needle into the cushion, bring it out an inch away, pull lightly and snip the thread at the surface so the tail slips inside.
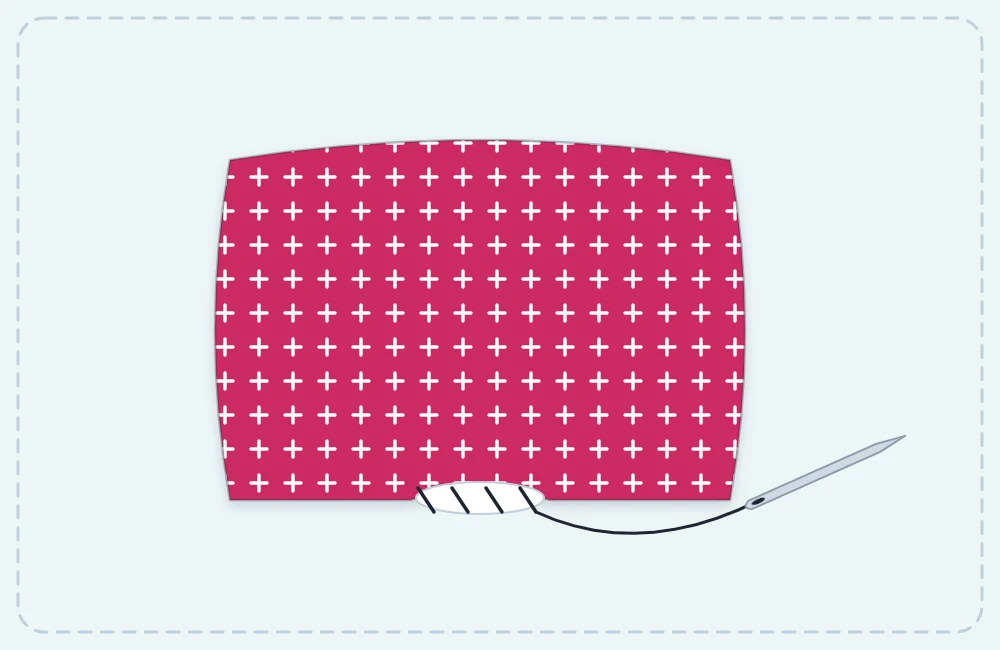
If hand sewing is completely new, the article on hand sewing basics shows how to thread a needle and tie a knot that holds.
Troubleshooting
The Corners Look Rounded
Either the corners were not clipped close enough or there is not enough stuffing in them. Next time, clip a little nearer to the stitching and pack the corners before anything else.
The Ladder Stitches Are Visible
Stitches show when they are long or when each one starts slightly ahead of the last instead of directly opposite. Keep them short, keep them inside the creases, and use thread that matches the fabric.
Using and Looking After Your Pincushion
Keep the pincushion to the right of the machine, within easy reach, and drop each pin into it as you pull it from the fabric. That habit is the simplest way to avoid sewing over a pin. Check the cushion now and then for needles that have been pushed all the way in, especially if children or pets are around.
Once the basic square feels easy, the same steps work at other sizes. Cut 4 inch squares for a small travel cushion, or cut a 5 x 7 inch rectangle for a longer one that sits in front of the machine. Whatever the size, the 1/4 inch seam allowance from the seam allowance guide stays the same.
Frequently asked questions
What is the best filling for a pincushion?
Polyester fiberfill is easy to find and works well when packed firmly. Wool stuffing is a traditional alternative. Fabric scraps tend to make a lumpy cushion that pins do not slide into easily.
Can the whole pincushion be sewn by hand?
Yes. Sew the seam with a small backstitch 1/4 inch from the edge instead of using a machine, then turn, stuff and ladder stitch the gap as usual.
How firm should a pincushion be?
Firm enough that it barely gives when squeezed. A soft cushion lets pins tip over and can let them pass straight through to the table.
